DIY Easter Banner: Fabric Pennants with Simple Shapes
A no-sew fabric pennant banner: cut triangles or swallowtail flags from a template, add egg, bunny and tulip shapes in felt or stenciled paint, then fold and glue the tops over twine.

Tutorial at a glance
Materials
- Half a yard (0.5 m) of cotton canvas or burlap
- Felt scraps or fabric paint
- Fabric glue
- 8 ft (2.4 m) of twine
- Fabric scissors
- Thin cardboard for a template
A DIY Easter banner made from fabric pennants has a weight and softness that paper cannot match, and it folds away into an envelope to be used again next spring. This version needs no sewing: the pennants are cut from a template, decorated with simple shapes and glued over a length of twine.
Seven pennants make a banner of about 5 ft (1.5 m), which suits most mantels, shelves and doorways. The method scales easily if you need more.
Choose the fabric
Pick a fabric with some body so the pennants hang flat instead of curling.
- Cotton canvas or duck cloth. Firm, smooth and easy to cut cleanly. It takes fabric paint well and frays only slightly.
- Quilting cotton. Lighter and available in many colors. Press it first, and expect soft edges unless you cut with pinking shears.
- Burlap. Rustic and textured, but it frays readily and sheds fibers. Felt shapes suit it better than paint, because the open weave lets paint seep through.
Two alternating colors, such as cream and sage, are enough. About half a yard (0.5 m) of fabric in total covers seven pennants with spare.
Make a pennant template
A cardboard template keeps every pennant identical. Draw a rectangle 6 in (15 cm) wide and 8 in (20 cm) tall on thin cardboard. The top 1 in (2.5 cm) is the fold-over allowance, so the finished pennant hangs about 7 in (18 cm) long.
- Triangle pennant. Mark the center of the bottom edge and draw a line from each top corner down to that point.
- Swallowtail flag. Mark the center of the bottom edge, measure 2 in (5 cm) straight up from it, and draw a line from each bottom corner to that mark to make a notch.
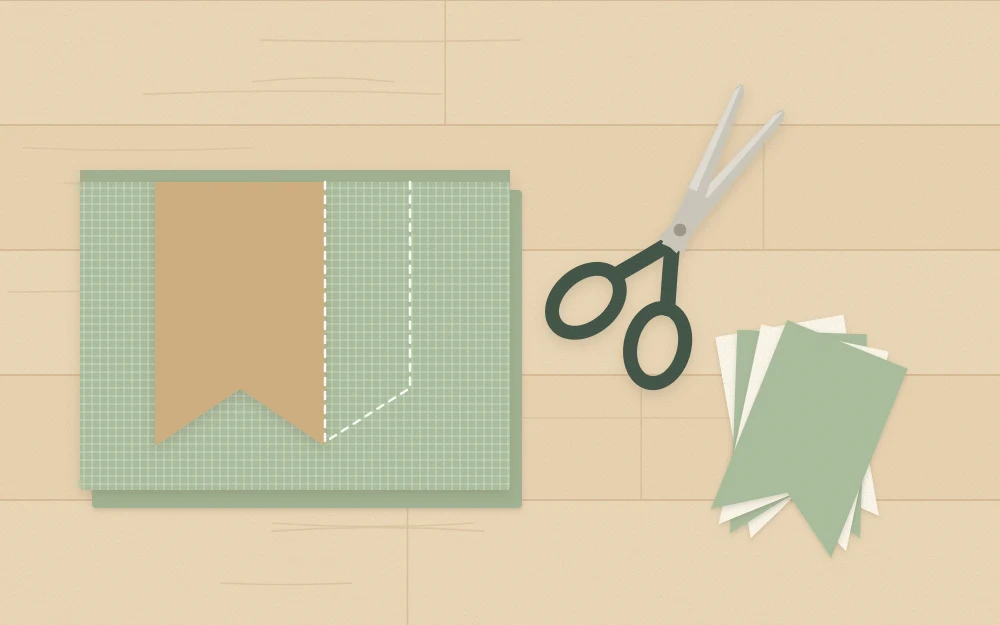
Cut the template out. Fold the fabric double, trace around the template with a pencil or chalk, and cut through both layers with fabric scissors to get two pennants per cut.
Tip
To limit fraying on cotton, run a very thin line of fabric glue along the cut edges with a fingertip and let it dry before decorating.
Plan the shapes
Three shapes repeated in order look calmer than seven different ones. An egg, a bunny head and a tulip work well: egg, bunny, tulip, egg, bunny, tulip, egg. Keep the bunny to a generic outline, a rounded head with two upright ears and no face.
Each shape should fit inside a space about 3 in (7.5 cm) wide and 3.5 in (9 cm) tall, positioned in the upper two thirds of the pennant, below the fold allowance. To draw shapes that are even on both sides, fold paper in half and cut half the outline against the fold, as shown in the guide to cutting symmetrical egg and bunny shapes.
Apply the shapes: felt or paint
Felt shapes
Trace each paper shape onto felt, cut it out and glue it to the pennant with fabric glue or tacky glue. Spread the glue thinly right to the edges so the corners do not lift, press flat and leave to dry. Felt gives a crisp edge and a slightly raised look, and it is the more forgiving method for a first banner.
Stenciled paint
For a flatter, printed look, cut each shape out of the middle of a piece of cardstock or stencil film so that the opening becomes the stencil. Then:
- Slide scrap cardboard under the pennant to protect the table.
- Hold or tape the stencil firmly in position.
- Load a stencil brush or sponge with fabric paint, or acrylic craft paint mixed with textile medium, and dab most of it off on scrap paper.
- Dab straight down from the edges of the stencil toward the middle. Do not brush sideways.
- Lift the stencil straight up and wipe its underside before the next pennant.
Too much paint is the usual cause of blurred edges. Two thin layers are cleaner than one heavy one. Let the paint dry fully before folding; times vary, so check the label.
Attach the pennants to the twine
Cut a length of twine about 8 ft (2.4 m) long. That allows roughly 18 in (46 cm) free at each end for tying.
- Lay the pennants face down in order, with even gaps between them. A gap of about 3 in (7.5 cm) brings seven pennants to roughly 5 ft (1.5 m); half that gives a fuller, shorter banner.
- Lay the twine across the backs, about 1 in (2.5 cm) below the top edges.
- Run a line of fabric glue along the top edge of the first pennant, above the twine.
- Fold the top edge down over the twine and press it firmly. Keep glue off the twine itself if you want to slide the pennants later.
- Repeat along the row, then weight the folds with a book while they dry.
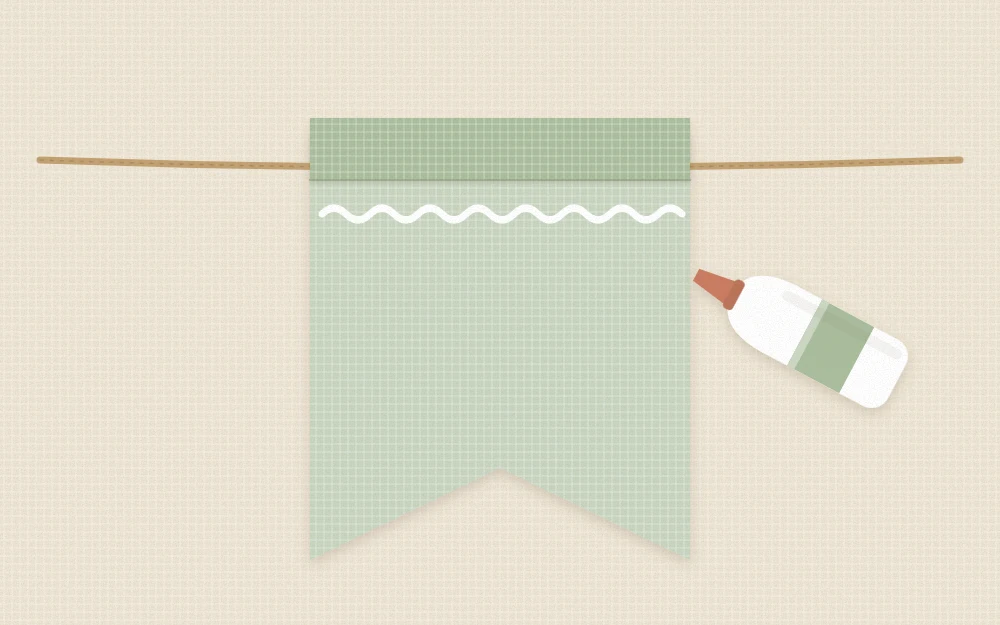
Fabric glue is usually dry to the touch within an hour or so and reaches full strength overnight, but go by the instructions on the bottle. Burlap benefits from a slightly wider line of glue because of its open weave.
Spacing and hanging
Tie a small loop in each end of the twine and hang the banner from removable adhesive hooks, or tuck the ends under weighted objects on a shelf. Let it dip gently in the middle; a banner pulled tight looks stiff, and one that sags too far hides the outer pennants. A drop of about 4 to 6 in (10 to 15 cm) at the center is a good starting point.
On a mantel, a fabric banner pairs well with a second, lighter strand hung slightly lower, such as the paper Easter egg garland. For how to balance a banner with the objects on the shelf, see these Easter mantel decor ideas. Keep fabric and twine well clear of a fireplace in use and of lit candles.
Storing the banner
Fold the banner pennant over pennant, like a paper fan, so the twine does not tangle, and slip it into a large envelope or a flat box. If the pennants crease, press them from the back on a low setting with a cloth over the fabric, avoiding the felt shapes and glued folds.
Frequently asked questions
How can the edges of the pennants be kept from fraying?
Choose a tightly woven cotton canvas, cut with sharp fabric scissors or pinking shears, and seal the cut edges with a very thin line of fabric glue. Burlap will always shed a little, so handle it as little as possible after cutting and accept a slightly rustic edge.
Can letters be used on the pennants instead of shapes?
Yes. Cut one letter per pennant from felt or stencil it in paint, and count the pennants to match the word. Keep letters about 3 in tall and centered. Simple block letters are far easier to cut cleanly than script, and a plain pennant at each end frames the word.
Can a fabric banner be washed?
It is better not to. Fabric glue, felt and stenciled paint react differently to water, and the pennants may pucker or loosen from the twine. Shake off dust, lift marks with a barely damp cloth, and store the banner flat and dry between seasons.