How to Blow Out Eggs for Decorating
A step-by-step method for emptying a raw egg with a pump or bulb syringe, rinsing and drying the shell, cleaning up afterward, and knowing when a craft egg is the better option.
Tutorial at a glance
Materials
- Raw eggs with uncracked shells
- Pushpin or strong needle
- Long needle or wooden skewer
- Egg-blowing pump or bulb syringe
- Two bowls and paper towels
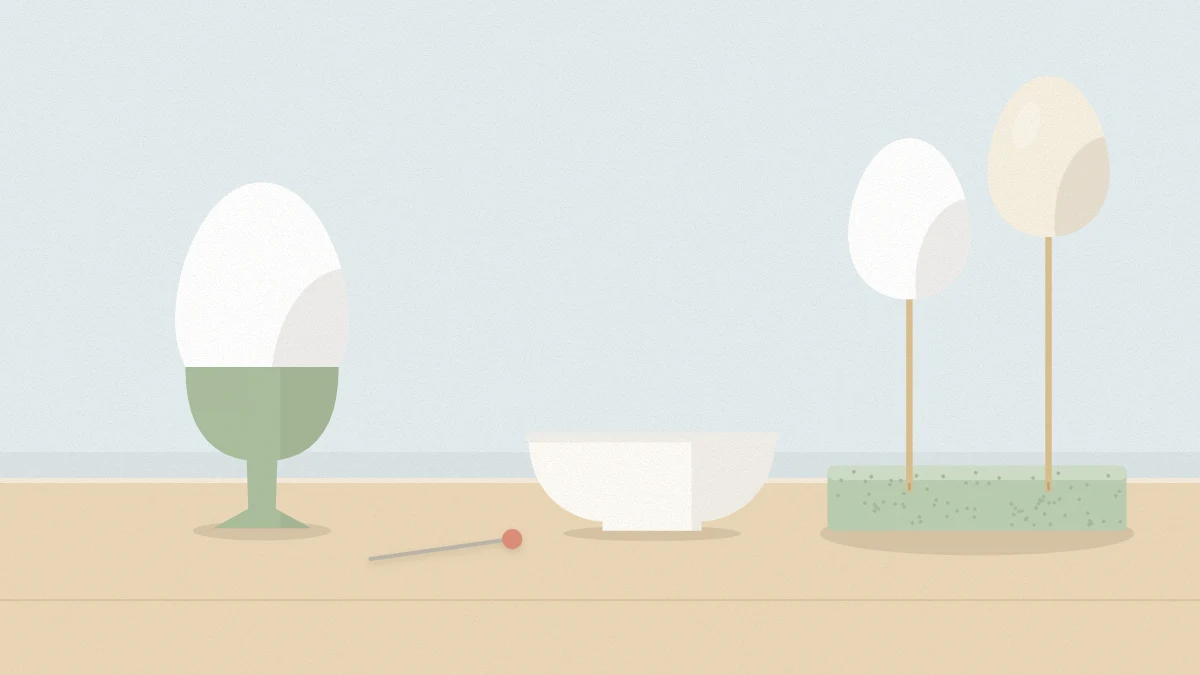
- Skewers and a foam block for drying
Once you know how to blow out eggs, you have a supply of light, hollow shells that can be painted, covered in paper and hung from the thinnest twig. The method is simple: make a small hole at each end, loosen the contents, push them out with air and rinse the shell.
It is a slightly messy job that rewards patience, and it involves raw egg, so a tidy setup and thorough washing up are part of the process. Blown shells are for decoration only.
What you need
- Raw eggs with smooth, uncracked shells
- A pushpin or a strong sewing needle
- A long needle, a straightened paper clip or a wooden skewer
- An egg-blowing pump or a bulb syringe
- A bowl for the contents and a second bowl of water for rinsing
- Paper towels, an egg carton and wooden skewers for drying
An egg-blowing pump is a small hand bellows with a fine nozzle, sold with craft supplies. A bulb syringe does the same job. Use one or the other instead of blowing by mouth, so that your lips never touch a raw egg.
Set up the work area
Clear a space beside the sink and cover it with paper towels. Set the eggs in a carton so they cannot roll, and put the bowls within easy reach.
Wipe each shell with a dry paper towel and check it for hairline cracks. A cracked egg will usually break under pressure, so set it aside.
How to empty the egg, step by step
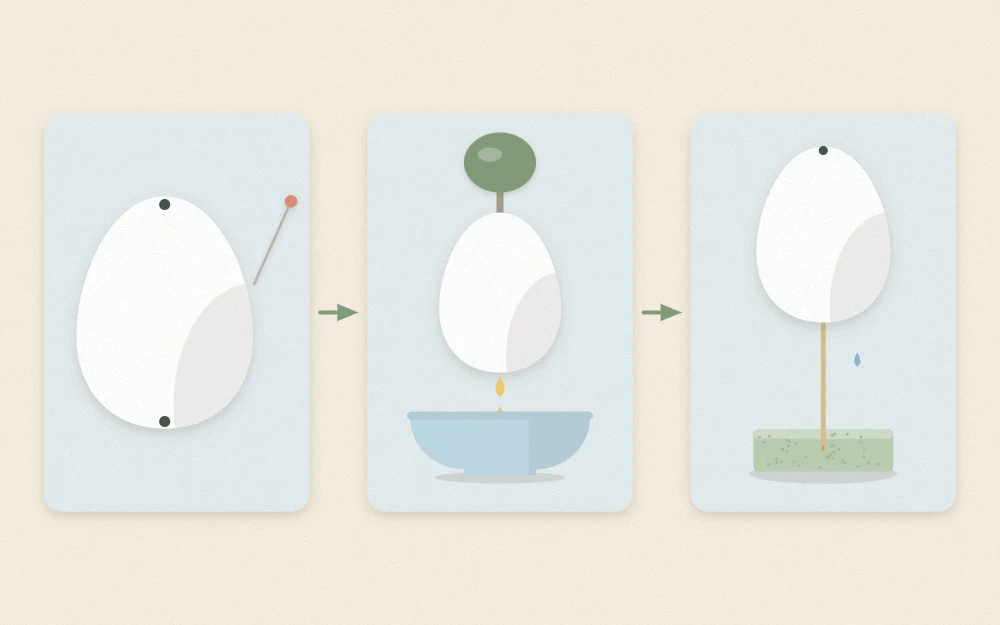
- Pierce the wide end. Hold the egg in the carton or cup it in your hand over the bowl. Press the pin against the center of the wide end and twist it gently, like a tiny drill, until it breaks through. Twisting works better than pushing.
- Pierce the narrow end. Turn the egg over and make a second hole in the same way.
- Widen the bottom hole. Enlarge the hole at the wide end to about 1/8 in (3 mm) by chipping carefully around its edge with the pin. The top hole can stay smaller.
- Break the yolk. Push the long needle or skewer through the larger hole and stir it around inside for a few seconds. This breaks the yolk and the membranes so the contents flow out.
- Push the contents out. Hold the egg over the bowl with the larger hole facing down. Place the nozzle of the pump or syringe against the smaller hole and squeeze slowly and steadily. Pause, let air back into the bulb, and repeat until the shell feels empty.
- Clear a blockage. If the flow stops, stir again with the skewer and shake the egg gently before continuing. Do not squeeze harder; too much pressure cracks the shell.
Rinse and dry the shell
- Draw clean water into the syringe, or hold the shell under water in the rinsing bowl until it half fills.
- Cover both holes with your fingers and shake the egg well.
- Push the water out with the pump over the sink.
- Repeat with water and a drop of dish soap, then with plain water until it runs clear and no soap remains.
Dry the shells upright
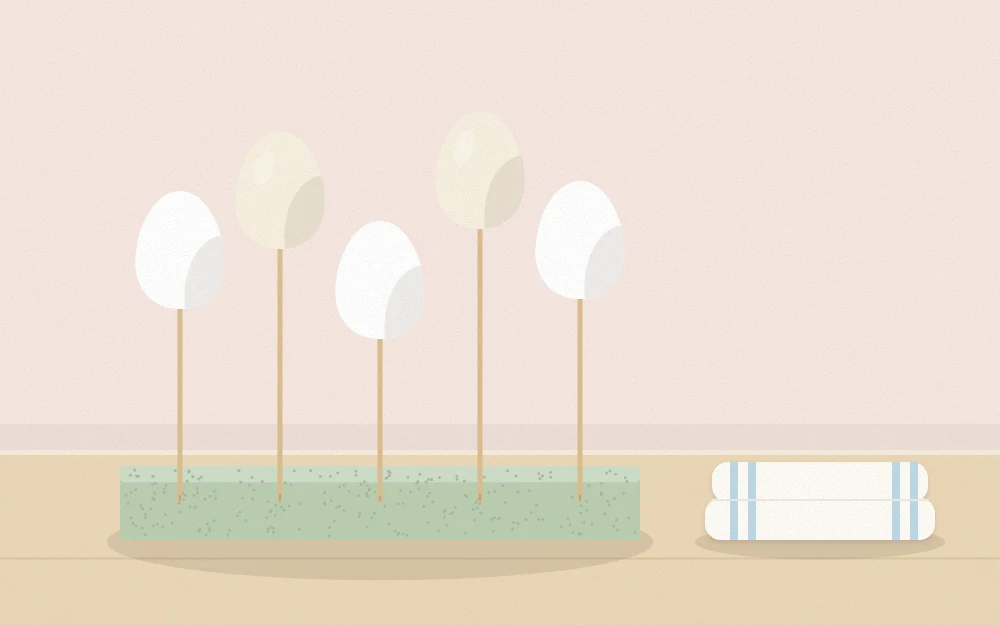
Water left inside will seep out later and spoil paint or paper, so the shells need to dry fully before you decorate them. Stand each shell with the larger hole facing down, either in the egg carton lined with paper towel or slipped over a wooden skewer pushed into a foam block or a jar of rice.
Leave them in an airy spot until no more drops appear and the shell feels light and dry. This often takes overnight and sometimes longer, depending on the room.
Clean up after handling raw egg
When the last shell is drying, clean everything that touched raw egg.
- Wash your hands with soap and warm water.
- Wash the pump or syringe, pins, skewers and bowls with soap and warm water, flushing soapy water and then clean water through the nozzle.
- Throw away the paper towels and wash the counter and sink with soap and warm water.
- Wash your hands again at the end.
Treat decorated shells as display pieces: they are not for eating, and neither is anything stored inside them. For questions about using or storing the egg contents, or about handling eggs in the kitchen generally, follow the USDA guidance on shell eggs rather than a craft tutorial.
Watch out
Pins and skewers are sharp, and this is a job for adults. Children can join in later, at the decorating stage, once the shells are clean and dry.
Common problems
- The shell cracks while piercing: the pin was pushed rather than twisted. Use lighter pressure and let the point do the work.
- Nothing comes out: the yolk is intact or a membrane is blocking the hole. Stir again and widen the lower hole slightly.
- The shell cracks while pumping: the lower hole is too small for the pressure. Enlarge it and squeeze more slowly.
Decorating and hanging blown eggs
A dry shell takes acrylic craft paint, markers and paper layers well. Support it on a skewer while you work so that you can turn it without touching wet areas. Tissue and napkin layers also strengthen a shell a little, which makes decoupage Easter eggs a good first project.
To hang a shell, tie a short piece of toothpick to a thread, slip it through the top hole and let it turn sideways inside. Blown eggs are light enough for fine twigs, which makes them the classic choice for an Easter tree made with branches.
When a craft egg form is the better choice
Blown shells are beautiful, but they are fragile. Choose a wood, paper mache, plastic or foam egg form instead when:
- you would rather not handle raw egg at all;
- children will help with the decorating or the display sits within their reach;
- the eggs will be stored and reused for many years;
- the design needs a firm surface for detailed brushwork, as with painted wooden Easter eggs.
Frequently asked questions
Do I have to blow out eggs by mouth?
No, and it is better not to. An egg-blowing pump or a bulb syringe pushes air into the shell just as well and keeps your mouth away from raw egg. Both tools also make rinsing easier, because they can flush water through the shell afterward.
How big should the holes in the egg be?
Keep the top hole as small as the pin makes it and widen the bottom one to about 1/8 in (3 mm). If the contents will not flow, enlarge the lower hole a little more. A slightly larger hole is easy to hide under a bead or ribbon later.
How should decorated blown eggshells be packed away?
Make sure each shell was rinsed well and is fully dry, then wrap it in tissue paper and place it in an egg carton. Keep the carton somewhere dry where nothing heavy will be stacked on it. Decorated shells are display pieces only and are never for eating.