Painted Wooden Easter Eggs: Simple Patterns That Work
Paint unfinished wooden eggs with acrylic craft paint: light sanding, a base coat on a skewer, a taped half-dipped line, dots, stripes and leaf sprigs, then a matte sealing coat. Decorative only.
Tutorial at a glance
Materials
- Unfinished wooden eggs
- Fine sandpaper, around 220 grit
- Acrylic craft paint in three or four colors
- Flat brush and fine round brush
- Low-tack painter's tape
- Matte water-based varnish
Painted wooden Easter eggs are among the most durable decorations you can make for spring. Unfinished wooden eggs do not crack, they take acrylic craft paint evenly, and a mistake can be sanded away and painted again. The finished eggs are decorative pieces that can be brought out year after year.
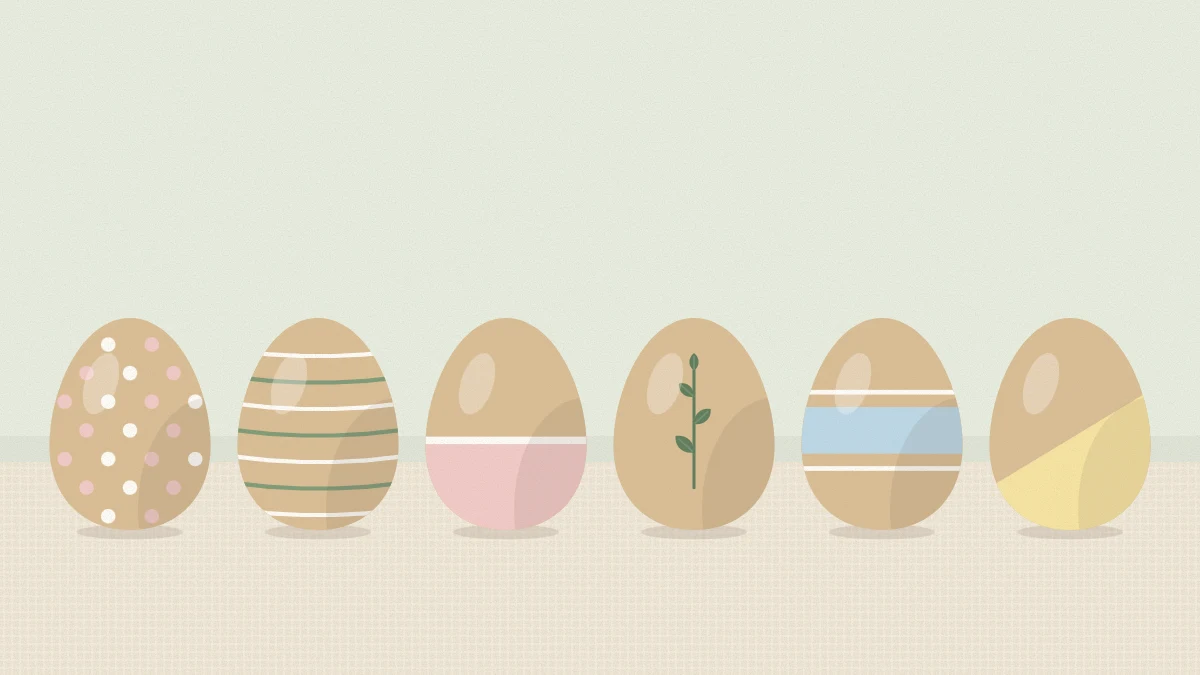
The patterns here are chosen because they need no drawing skill: a dipped half, dots, stripes and a leaf sprig. Each one also looks good with some of the bare wood left showing, which keeps a set of eggs calm and modern.
What you need
- Unfinished wooden eggs, about 2.5 in (6.5 cm) tall, with or without a flat base
- Fine sandpaper, around 220 grit
- Acrylic craft paint in three or four colors
- A soft flat brush about 0.5 in (1.3 cm) wide and a fine round brush
- Low-tack painter’s tape or narrow craft tape
- Wooden skewers and a block of foam, or a few bottle caps
- Matte water-based varnish or sealer
Limit the colors before you start. Three muted shades plus the natural wood make a coherent set; the Easter color palettes guide has several combinations to choose from.
Prepare the eggs
Sand each egg lightly in the direction of the grain to remove fuzz and any rough patch, then wipe away the dust with a dry cloth. This takes under a minute per egg and makes a visible difference to how smoothly the paint lies.
Next, give the egg something to stand on. Many wooden eggs have a small hole in the base; push a skewer into it and stand the skewer in a foam block so you can paint all the way around. Eggs without a hole can rest on an upturned bottle cap: paint the top half, let it dry, turn the egg over and paint the rest.
Base coat or bare wood
Decide for each egg whether it gets a full base coat or stays natural. A good set mixes both. For a base coat, brush on a thin layer with the flat brush, working from the top down, and let it dry before adding a second. Two thin coats cover better than one thick coat, which tends to show brush marks and drips.
Acrylic craft paint is often touch dry in about 15 to 20 minutes, but that depends on the paint and the room, so check the label and test with a fingertip near the base.
Tip
For a softer, stained look, thin the paint with a few drops of water and wipe it on with a cloth. The grain shows through the color.
The half-dipped egg
This is the easiest pattern and one of the most effective. It looks as though the egg has been dipped in paint, but tape gives a cleaner line.
- Wrap a band of tape around the egg where you want the color to stop: across the middle, a third of the way up, or on a diagonal.
- Press the edge of the tape down firmly with a fingernail all the way around. On a curved surface the tape will pucker slightly; only the edge nearest the paint needs to lie flat.
- Paint from the tape toward the end of the egg, brushing away from the tape edge so paint is not pushed underneath.
- Apply a second thin coat once the first is dry to the touch.
- Peel the tape back slowly, at a low angle, while the last coat is still slightly soft.
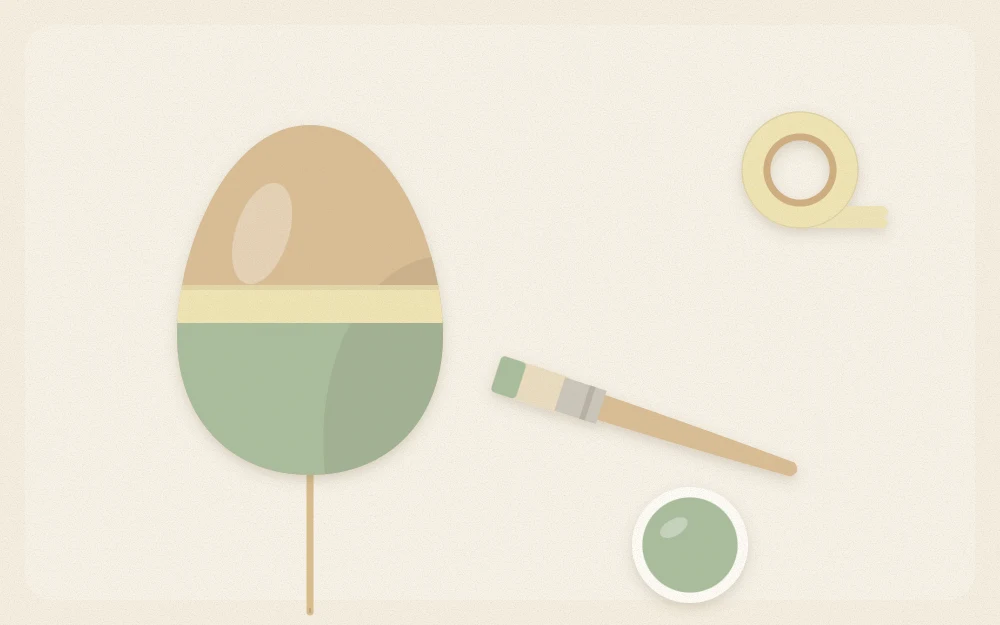
If a little paint has crept under the tape, let it dry and scrape it away gently with a fingernail or a fold of fine sandpaper.
Dots, stripes and sprigs
Dots
Dip the handle end of a brush straight into the paint and touch it to the egg. Reload for every dot to keep them the same size, or make two or three dots per dip for a set that fades gradually. For even spacing, place one ring of dots around the widest part first, then add rows above and below, offset like bricks. A pencil eraser makes a larger dot and a toothpick a tiny one.
Stripes
Thin horizontal stripes are easiest with the egg on its skewer. Hold the fine brush still against the surface and turn the skewer slowly, so that the egg moves and the hand does not. Slight wobbles are part of the charm. For wider, sharper bands, mask with two strips of tape and paint between them.
Leaf sprigs
Paint one thin curved line as a stem with the fine brush. Then add leaves in pairs: press the brush down near the stem and lift it as you pull away, which leaves a small teardrop. Five to seven leaves are enough. One sprig on bare wood, in sage or soft white, is often the most elegant egg in the set.
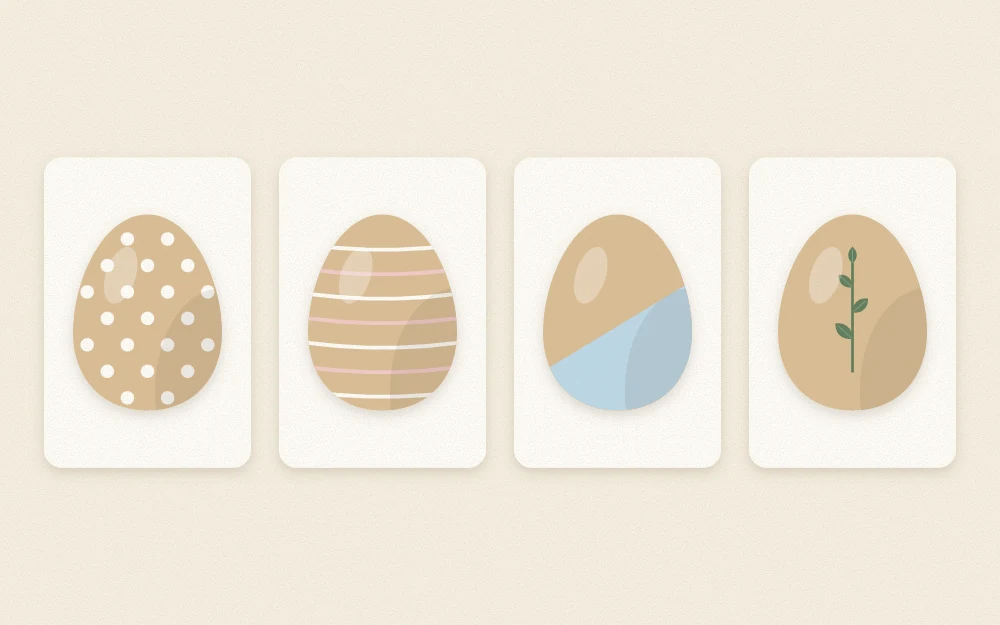
Plan the set as a whole
A dozen eggs each painted differently can look busy. A simple ratio helps: about a third of the eggs plain or half-dipped, a third with dots or stripes, and the rest split between sprigs and bare wood. Repeat each color on at least three eggs, and keep one pattern per egg.
Seal with a matte coat
When the paint is completely dry, brush on a thin coat of matte water-based varnish, covering the bare wood as well as the painted areas so the sheen is even. Matte keeps the look soft; gloss tends to highlight every brush mark. Let the eggs dry on their skewers for as long as the product label suggests before handling them.
Watch out
These eggs are for display only. Store them with the decorations, not in the kitchen, and keep small eggs out of the reach of young children.
Ways to display them
Painted wooden eggs have enough weight to sit steadily in a shallow bowl, a footed dish or along a shelf. They also work well at the front of a basket arrangement, as described in the guide to styling a decorative Easter basket.
To hang them, twist a small screw eye into the top of each egg and thread a ribbon through it. Wooden eggs are heavier than paper or blown ones, so hang them on the lower, sturdier twigs if you are making an Easter tree with branches. Between seasons, wrap each egg in tissue and store the set in a box in a dry place.
Frequently asked questions
Do wooden eggs need a primer before painting?
Usually not. Sanded unfinished wood takes acrylic craft paint well, and two thin coats give solid color. A white base coat is worth adding under very pale or bright shades, because the warm tone of the wood can dull them. Skip primer wherever the grain is meant to show.
How can a smudged pattern be fixed?
Wipe wet paint away at once with a damp cloth or cotton swab. If it has dried, sand the area lightly with fine sandpaper until the mark is gone, wipe off the dust and repaint. On an egg with a base coat, touch up the base color first and let it dry.
Can paint pens be used instead of a brush?
Yes, acrylic paint pens are useful for fine stripes, small dots and sprig stems, especially over a dry base coat. Test the pen on the underside first, since some bleed along the grain of bare wood. Seal the finished egg with the same matte varnish as brush-painted eggs.