Paper Bunny Silhouettes: A Simple Easter Window Decoration
Draw a seated or upright bunny from two ovals and two ears, cut it cleanly from white or kraft cardstock, add a fringed paper tail and fix it to a window with removable putty.
Tutorial at a glance
Materials
- White or kraft cardstock, 65 lb (176 gsm) or heavier
- Pencil and soft eraser
- Sharp fine-point scissors
- White paper strip for the tail
- Glue stick
- Removable mounting putty
A paper bunny silhouette is about as simple as Easter decor gets: one sheet of cardstock, one clean outline, no face and no detail. That restraint is what makes it look elegant in a window, where daylight turns the shape into a crisp graphic against the glass.
Two poses cover most uses. A seated bunny in profile suits a windowsill or mantel, and an upright bunny seen from behind, with its ears raised, works well in a row along a pane. Both are drawn from the same few basic shapes.
Materials and paper choice
- White or kraft cardstock, 65 lb (176 gsm) or heavier
- A pencil and a soft eraser
- Sharp scissors with a fine point
- A strip of white paper or tissue for each tail
- A glue stick or tacky glue
- Removable mounting putty
White cardstock gives the strongest contrast against a dark view or evening glass. Kraft has a warmer, more natural look and pairs well with wood, linen and greenery. Either way, choose a paper that is solid in color all the way through, because both sides are seen in a window.
Draw the seated bunny from two ovals
You do not need to be able to draw. The seated profile is built from two ovals and two ears, then smoothed into a single outline. Work on the back of the cardstock or on scrap paper that will become a template.
- Body: draw a large oval lying slightly tilted, about 5 in (13 cm) long and 3 1/2 in (9 cm) tall. The lower edge is the line the bunny sits on.
- Head: draw a smaller oval, roughly half the size, overlapping the upper front of the body.
- Ears: add two long, narrow leaf shapes rising from the back of the head. Make them about as long as the head is wide, and let one sit a little behind the other.
- Outline: trace around the outside of the whole group in one flowing line, softening the dips where the ovals meet at the neck and back.
- Base: flatten the bottom into a straight line so the finished piece can stand on a sill or lean against a wall.
- Clean up: erase the inner construction lines, leaving only the outline.
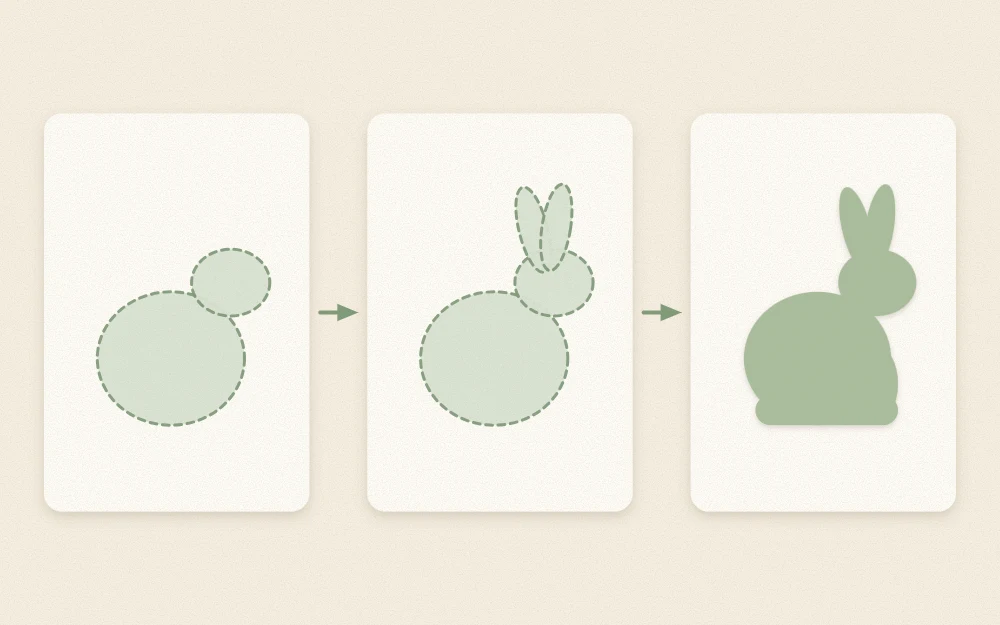
Keep the shape generic and plain: rounded back, simple ears, no face, clothing or expression.
Draw the upright bunny
The upright pose is symmetrical, which makes it even easier. Fold a piece of paper in half and draw half the shape against the fold: half of a tall, rounded body, half of a round head above it, and one long ear. Cut through both layers and unfold.
The fold-and-cut method, along with tips for tracing a template onto other materials, is explained in the guide to cutting symmetrical egg and bunny shapes.
Cut cleanly
A silhouette shows every wobble, so take the cutting slowly.
- Rough-cut around the shape first, leaving a margin, so you are not handling a full sheet.
- Use the middle of the blades for long curves and the tips only for tight spots.
- Turn the paper into the scissors rather than turning the scissors.
- Cut into the notch between the ears from both sides, meeting at the bottom, instead of trying to pivot.
- Smooth any small corners with a final thin trim.
Once one bunny looks right, use it as a template. Trace it at the same size for a repeating row, or draw larger and smaller versions for a group of three. A craft knife on a cutting mat gives very sharp inside curves, and it is a tool for adults only.
Tip
Trace on the back of the cardstock with the template flipped over. Any pencil marks that remain will face the glass, and the bunny will still point the way you planned.
Add a paper pompom tail
A small tuft of white paper is the only decoration the silhouette needs, and it gives the flat shape a little depth.
- Cut a strip of white paper or two layers of tissue about 1 in (2.5 cm) wide and 8 in (20 cm) long.
- Snip a fringe along one long edge, with cuts about 1/8 in (3 mm) apart that stop short of the opposite edge.
- Roll the strip up tightly along the uncut edge and glue the end down.
- Fluff the fringe outward with your fingers until it forms a round tuft.
- Glue the flat base of the roll to the lower back of the seated bunny, or to the center of the upright one.
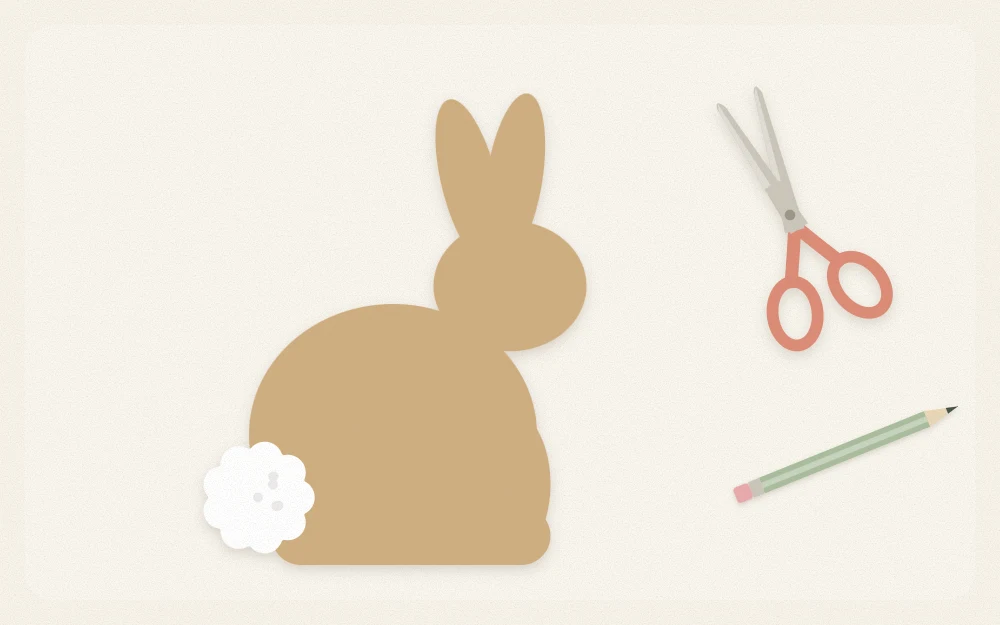
A flat white paper circle is a neat alternative when the bunny will sit close against the glass.
Fix the silhouettes to glass
Removable mounting putty holds light cardstock well and lifts away afterward. Wipe the glass so it is clean and dry, then roll three or four pieces of putty about the size of a lentil. Press them to the back of the bunny at the ears, the middle and the base, and press the shape gently onto the pane.
Check the packaging for the surfaces the putty suits. Condensation softens paper, so on windows that mist up, stand the bunnies on the sill, leaning against the frame, instead of sticking them to the glass.
Arranging a window or mantel
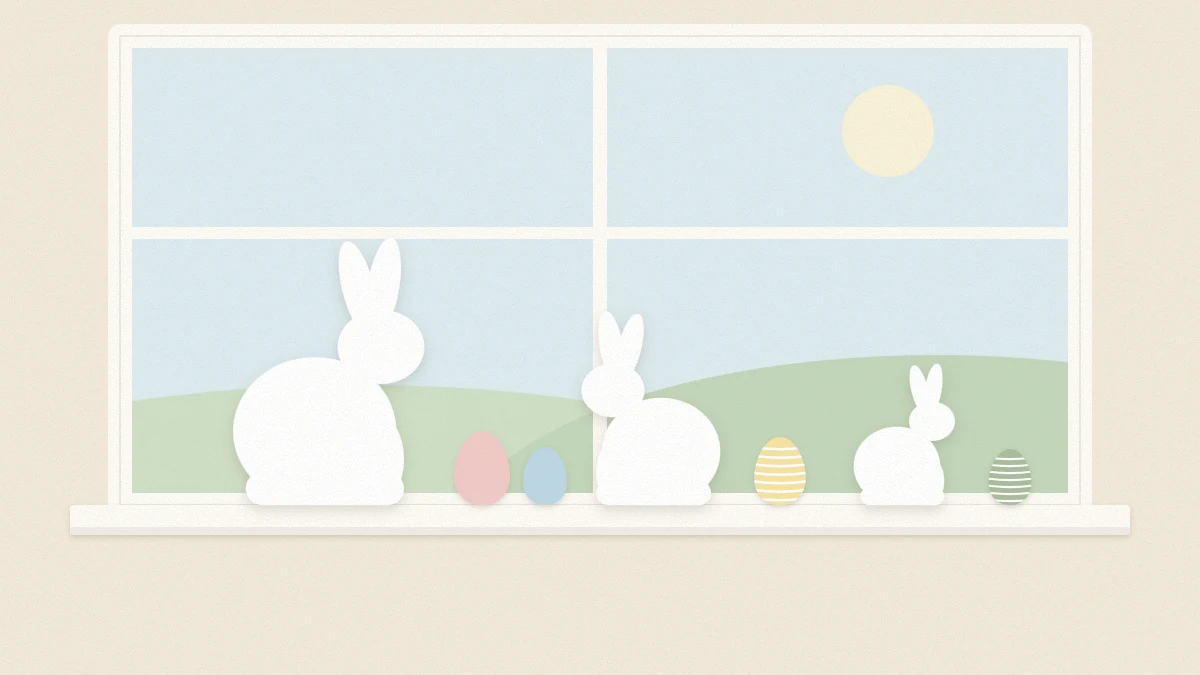
Three silhouettes in different sizes look more natural than a matched row. Try heights of about 4, 6 and 8 in (10, 15 and 20 cm), with the largest off to one side and all three facing toward the center of the window.
Leave clear space around the group, and add only one or two supporting pieces, such as a few paper eggs along the sill or a jar of stems. On a shelf, the bunnies can lean against the wall between taller objects; the guide to Easter mantel decor shows how to balance heights.
The same template works in fabric too. Traced onto felt and strung on twine, it becomes a felt bunny garland for the wall beside the window.
Watch out
Keep paper shapes away from candles and heaters on sills and mantels, and use flameless LED candles nearby instead.
Frequently asked questions
What paper works best for bunny silhouettes?
Cardstock of 65 lb (176 gsm) or heavier stays flat on glass and stands upright on a sill. White gives the sharpest contrast, and kraft looks warmer beside natural materials. Choose paper that is the same color on both sides, since a window shows the front and the back.
How do I stick paper to a window without leaving marks?
Use small pieces of removable mounting putty on clean, dry glass and press lightly. Follow the packaging for suitable surfaces and remove the putty by rolling it away rather than scraping. On windows that collect condensation, lean the shapes on the sill instead.
Can I draw a bunny silhouette without a template?
Yes. Sketch a large tilted oval for the body, a smaller oval for the head and two long leaf shapes for ears, then trace one smooth line around the outside and flatten the base. Cut the first one, adjust it until the proportions please you, and use it as the template for the rest.